10 July 2011

Cherries with feta

Home.  
There are many ways to interpret where 'home' is.  For some people, it is where they live now, for others it is where they were born, where they grew up, or where their parent's live.  As for me, I am still not sure where 'home' is.  You see, I was born in Oklahoma, grew up in Oklahoma, and still live in Oklahoma.  But I have never felt that I belonged here.  As a kid, once a year my parents would take me with them to California, Florida, or Mexico once a year in the summertime for a little vacation.  I think at the time I was too young to appreciate being in those other places.  Of course, even by the time I was 8 years old I knew a good filet mignon from a bad one, but I was not yet able to appreciate any of the local foods and cultures.   

There were a few years in between our family vacations and my going to Europe for the first time.  Fortunately, I was much older (17 years old) and already completely food obsessed.  I remember almost everything I ate and how it all tasted.  I can remember just experiencing so much while I was there that I didn't want to leave.  I kept a journal to make sure that I never lost any of those memories and took photos as well.  Since then, I have enjoyed vacations in Montreal and Bulgaria, the latter being my most recent.  Bulgaria in the summertime is spectacular.  Their produce rivals even that of the freshest you could find at any farmers' markets in America.  The cities are so large and yet so compact that it only makes sense to walk the one or two miles to the restaurant that you will be having dinner at.  Everyday, our hotel rooms were stocked with cherries, apricots, and strawberries that were so sweet, juicy, and ripe.  Walking around the city, you will find the fruit stands just overflowing with fruit, the tables groaning under the weight, just begging you to come and buy some.  

I felt what they call 'culture shock' not when I entered Bulgaria, but when I came back to America.  They are such different lifestyles, and I feel even the same when returning from France, Italy, and Montreal. Those, to me, are where home is.  Those are the places that I have been happiest, and thankfully, I am able to visit them and pretend to live there, at least for a few days.


I know that you might think me crazy for finding inspiration from a hotel's breakfast buffet, but this hotel did things right.  Sure they had toast, bacon, and scrambled eggs, but they also had ruby red tomatoes, cucumbers, feta cheese, yogurt, and tons of fruit out every morning as well.  The second day that I had arrived at my house from the airport, I walked to the grocery store, for the first time, and bought a bag of cherries, among other things.  After a day or two of eating them as they were, I thought back to the breakfast buffet, and after a second of ice box rummaging, obtained a bit of feta. I took the pits out of the cherries and set the feta ontop of them and savored every bite.

Please, taste cherries before you buy them, as their ripeness and sweetness can vary vastly, especially when your only supplier is the super market.  When you have a bag of perfectly sweet and juicy cherries, I urge you to get ahold of some good feta (not the pre-crumbled kind, please) and marry the two in a bowl or on a plate of straight off of the kitchen counter.  It is sweet and salty, but in a very fresh and summery way.  

07 July 2011

Dolmades

When in Rome.......or at least, that is how the saying begins.  

Like many other people, I love to travel- live, to travel, even.  Whether revisiting an old city or venturing to a new city, the excitement, planning, and memories mean more to me than I can express.  I have been very fortunate in my (near) 22 years of life to have been to several states and a few countries and traveled by car, bus, train, and plane.  I have enjoyed all of my trips immensely and for a multitude of reasons.  Take, for example, fresh fruit on hot summer mornings in Mexico, buying bread and wine in France, eating absurd amounts of velvety gelato in Italy, and even warming up with a big bowl of poutine in Montreal (google poutine, I dare you.  Rest assured that is isn't the most beautiful thing in the world, and, for some, even the description is off-putting, but after one bite you will be a slave to it.  You will seek it out.  You will go to a place called 'Frites Alors' and marvel at the menu that is comprised entirely of different versions of the stuff....I digress....)

As for 2008, I was to make my biggest trek across the globe yet.  Farther east than even Italy, to a place I had heard of many times from good friends, a country called Bulgaria.  On a lovely evening in Montreal, between my birthday (18) and my Mother's (50) we were sitting on the balcany of our hotel enjoying a beer and watching the sun set.  I went inside of the room, no doubt for another beer seeing as back in America, I was underage, and found that I had a message from my dear friend, Diana.  She had invited me to fly home with her to Bulgaria for the winter holidays to visit her family.  Now, by this time I had done most of the aforementioned traveling, so I was more than happy to add this to my list.  Naturally, I accepted and set off to plan my trip for Bulgaria while vacationing in Montreal.  Hurried phone calls were made, there was much  giggling, and my savings account was quickly diminishing, but how could I care?  I was going to spend not one, but two weeks in Bulgaria with some of the kindest people that I have ever met.  Diana had moved to another state, so the first hurdle was to fly to her from Oklahoma.  I had never flown before, but I was not afraid, infact, I was very excited.  I felt so grown-up.  

We stayed at her apartment for a day or so, packing and repacking, shopping, and more packing, but eventually making it to the airport and then to Bulgaria.  Our final destination was to be the capitol city, Sofia and what a city it is.  I honestly wish that I had remembered more about my trip, but it was such a whirl wind trip that most of what I remember was the food we ate, the people we met, and the many, many clubs that we went to.  One of my most fond memories was after a night of club hopping and chapped cheeks, arriving back to their parents' apartment early in the morning with Diana's younger sister.  After the rickety ride in the elevator, and unlocking the many locks to the front door, managing to somehow get off our snow encrusted boots, we would shuffle into the kitchen like school girls foraging for the makings of a midnight feast.  We did this on several occasions, and indeed, Diana's mother being the fantastic cook that she is, the ice box was always stuffed with that night's leftovers just for us.  One night, before Christmas, I believe it was, there was a massive pan on stuffed grape vine leaves.  We knew we shouldn't have, but we couldn't help our selves.  I went to the ice box for some yogurt, and Boriana for a plate and some vine leaves and together we feasted.  I had had vine leaves before, but never fresh and homemade.  These were such a joy to eat, and now, as I can say from experience, a joy to make as well.  Qutie simple to make, really, requiring little more than some cooked rice, sauteed onion, and then its fill, roll, and simmer.


112 grams grape leaves, packed in brine
1/3c. arborio (or other) rice
1/2c. finely chopped white onion
1 clove garlic, finely minced (or grated)
1/2c. minced tomatoes
2T. chopped pine nuts
zest & juice of half a lemon
1T. fresh* dill, chopped
2T. fresh* parsley, chopped
1T. fresh* mint, chopped
1T. olive oil, and more for cooking

-To begin, place the grape leaves into a bowl and pour over freshly boiled water.  Let this set for 20 minutes, then drain and repeat with tepid water. 
-Meanwhile, cook the rice in a small pan using a ratio of one part rice to two parts water. Bring the water to a boil, and then cover and simmer for 15-20 minutes.
-In a saute pan, saute the onion, tomatoes, and garlic until they begin to color and soften.  
-Combine the vegetables with the rice in a bowl and add the pine nuts, lemon components, and herbs.  Stir to combine.
-Now is time for the rolling:  take a grape leaf and place it on a surface (I am quite fond of a wooden cutting board) with the 'shiny' side facing down.  Cut out any stems, if neccessarry.  Place a reasonable amount(1-2 teaspoons) of the rice mixture on the widest part of the leaf and then roll as if you were making spring rolls or a burrito, rolling part of the way, tucking in the sides, and finish rolling.  When you have finished a roll, place it into a flame resistant pot.  (The only thing about this pot that you need to make sure of is that you have a place that will fit into the pot to hold down the rolls while they cook.)  Continue rolling and 'potting' the dolmades until you have run out of leaves, rice, or both.  Place the aforementioned plate directly over the dolmades, and cover with water and the olive oil.  Bring this to a boil and simmer for 40-45 minutes.  Let them cool in the broth (store in this broth as well).  


23 June 2011

Rose Scented Yogurt with Pistachios

As with every season, summer brings a bevy of different flavours, textures, and cravings.  Everything seems to be cool, crisp, and fresh. Think crisp baby greens, luscious tomatoes, juicy melons, sweet strawberries, and tart cherries. 

 It is funny what heat does to the mind, and I am so amused to think of the other things that we begin to crave that aren't necessarily 'cooling' or 'crisp', like honey.  And pistachios.  And greek-style yogurt.   These three things, along with a drop of rose water and the merest pinch of cardamom make for the perfect breakfast for a hot summer morning. 

It is both light but pleasantly filling.  It is a little sweet and a little salty and there is nothing that the crunch of a pistachio enrobed in creamy yogurt can't fix. 


5 oz. greek yogurt (fat content of your choice, but I prefer 0%)
1t. honey (raw is lovely here)
1 drop of rose water
1 pinch of dried cardamom
12 salted pistachios, crushed

Just combine the first four ingredients and stir to combine in a bowl.  Sprinkle on the crushed pistachios and enjoy.

Please take head with the rosewater; if you are unfamiliar with it, it is lovely when used in small quantities, but much like that violet eye-liner you had in highschool, more is not more.  This is some pretty potent stuff and it can go from pleasantly floral to your grandmothers potpourri in a matter of drops. 

17 June 2011

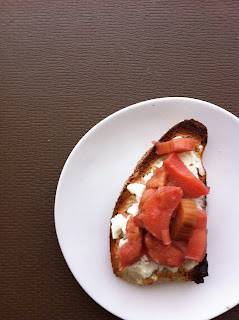
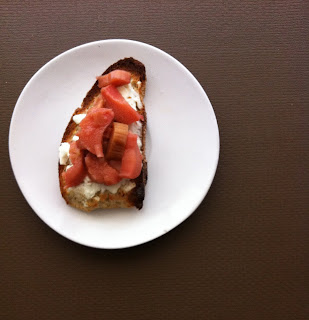
Rhubarb and Chevre Toasts

It isn't often that I have left overs in my house.  When I do, I am usually unsure of how to use them, other than how they were originally intended.  While there is certainly nothing wrong with that, it does seem like bit of a waste. 

There are entire cook books, blogs, and who knows what else that are dedicated in their entirety to the wondrous 'left over'.  When I cook, I adapt most recipes to suite the amount needed for my boyfriend and I or just myself.  Truth be told, I do that mostly to avoid having left overs.  You see, there are so many recipes out there, new ones each day, every hour, every minute, that I feel as though I will never be able to whittle down my ever growing stack of clippings, jotted down recipes, and dog-eared cook books. 

When it is my turn to cook, I make something different, almost every time.  I rarely make the same thing twice so when I do, you know it was good.  Luckily, rhubarb is one of those things that I don't have many recipes for, so when I had some broiled rhubarb left over from a salad I made, it was a rather momentous occasion.  It took me a couple of days to sort out what I wanted to do with it, after all, I had only one chance and I did not want to mess it up. 

Also, left over from the salad, some chevre and while there were some greens in the ice box as well, I wanted to take at least a some what different approach.  A couple of days later, after arriving home utterly famished from a yoga class, it was time to go into action.  Poking around the cupboards and ice box, I knew I didn't want it over yogurt or cottage cheese, but after seeing a slice of bread I knew what I wanted. 


After a few brief intervals of toasting: first bread, then bread and a layer of chevre, and then with the final crowning of rhubarb, this perfect little snack is just how left overs should be. 


If it seems a little silly to broil only a small portion of rhubarb, by all means, broil a few stalks and stash them in a jar in the ice box.  As you will see, they are broiled with a bit of honey, so any that you would have left over would be lovely spooned over some custard, ice cream, cottage cheese, yogurt, or any other way that you can think.  Rhubarb is so tart that even with the honey, it is lovely with savory dished as well.  If you don't have any chevre around, ricotta or cream cheese would be just as lovely.

4 inches of rhubarb (or 3-4 stalks), cut into 1/2 inch slices
1/2-1 t. honey (or 1 tablespoon)

1-2T. chevre (fresh goat's cheese)

1 slice of bread

-In an oven safe dish, broil the rhubarb and honey until soft, 3-5 minutes.
-Then comes the toasting: first the naked bread, then cheese smeared bread, and then, with the rhubarb, if using from ice box. 

Of course, if you are using the rhubarb that you just made, there is no reason for the third toasting.  Be sure to have some coarse salt near by when you eat this, either kosher or french grey sea salt for sprinkling.

15 June 2011

Crisp Rice Squares

For some one with an almost insatiable sweet tooth, I surprise even myself with how little I bake.  It isn't that I don't have the time or energy or don't like to, it is just that it isn't possible for me to bake a pan of brownies and have any left- after ten minutes.  I cannot be left alone with mass quantities of sweet things.  I cannot be trusted.  If you wanted some of those cookies, sorry Charlie.  They are probably gone.  History. 

It may also surprise you to know that after close to three years of being with a man who has not one, but two children who also have insatiable sweet tooths, did it occur to me to bake for them.  That way I can have my cake and they can too.  I am still so set in my ways that I don't bake and confect sweet things as much as I would like to, but even though old habits die hard, I am in for the fight.  After all, there are 'Crispy Rice Squares' at stake....


If you have never made these before, go now and by the three ingredients that you need and take five minutes out of your afternoon to make them.  You will not be disappointed.  They are a cinch to make by merely melting a pat of butter with a package of mini marshmallows, stirring it into a box of crisp rice cereal, and pressing into a pan.  Yes, they are terribly easy to make.  Yes, they are absurdly sweet.  Yes, they are much to easy to eat.  I say, go for it. 


These were adapted from the wonderful Nigella Lawson from Feast.

I cut the recipe in half because we were only four, but they were quite thin, so even if it is only a small amount of people, I would consider making the full batch.  There isn't anything in this to go bad anyways, so left overs are a mere gift, should there be any.

2T. butter
6c. mini marshmallows (one package)
6c. crispy rice cereal (one box)

-Melt the butter and marshmallows together over a gently flame in a pot, stirring occasionally.  It may seem tedious, but the goal is to avoid accidentally burning the sugar in the marshmallows.
-When melted, stir into the cereal, working quickly as the mixture cools surprisingly rapidly, and press into a buttered dish, 8x8 or 9x9. 

03 June 2011

Tarator


I have always been turned off by cold soups.  The idea of sipping and slurping something from a spoon that isn't hot and soothing or cold and pudding like just seems wrong to me.  Even being a self-proclaimed lover of all things french, I cannot stand to eat vichyssoise and I have never really been one for gazpacho (however, I make a wonderful self-titled 'white-trash' version with one container of salsa and one (smaller) container of pickled vegetables from a local Mexican restaurant that I mix together that isn't half bad).  

Considering that I have a pretty broad palette when it comes to food and am even daring at times when it comes to trying new things, I cannot help but be surprised with myself for not liking something so simple.  Luckily, a couple of weeks ago, I found a recipe that caught my attention.  It was, indeed, for a cold soup.  It is a Bulgarian version of something that may have originated in Greece, or maybe the Greek make their own version of the original Bulgarian version.  Either way, tarator (таратор) is easily described as a sort of thin tatziki but with out the burn of raw onion that tatziki can sometimes have and with the richness of olive oil.  It is a dream to put together and even more so to eat.  So much so that I have made it no less than three times in two weeks!   

Begin with some yogurt, a couple of grated Persian cucumbers, a few cloves of garlic, fresh dill, some  good olive oil, and a few stirs later you have a gorgeous soup that is both refreshing and filling perfect for the scorching summer months.


400g. yogurt (~16oz or half of a large tub)
2 Persian or Kirby Cucumbers
3 cloves of garlic
2T. fresh dill
1T. extra virgin olive oil
1-3c. water 
salt, to taste

-Mix the yogurt to get out any lumps and begin grating: the cucumber (parts of the skin might not grate:  just discard (or eat!) the pieces) and the garlic.  
-Chop and stir in the dill.
-Stir in the olive oil and begin adding the water starting with one cup and continuing in half cup increments until you get the texture that you prefer.  (I prefer to use a whisk at this point.)
-Add salt to taste. 


Avoid black pepper here as I feel that it is a distraction to the fresh and natural flavours of the tangy yogurt, the spicy garlic, and the crisp cucumber.


If you have some walnuts (I use raw, but toasted would be fine) on hand, then chop up just 1/4-1/2oz. per bowl and stir in.  I wouldn't add them to the whole batch, which serves two-three, until you are ready to serve.  Certainly, this is a bowl of fresh flavours, but it is much better and mellowed after at least a day or so in the ice box.  


01 June 2011

The rhubarb story....


One day, a few years ago, I sat down with my Meme to discuss what she wanted for dessert on Mother's day.  As we talked and talked, our conversation wandered off topic, as they so often do, and soon she began telling me the "Rhubarb Story".  It wasn't much of an epic tale, more just a happening.  An occurrence, if you will.  It was a sweet nothing that she happened to remember, all of these years later. 

Right after her and my Grandad got married, sometime around 1943 or 1944, they moved to Lawton into an apartment that they had found.  They were in their early twenties, and my Grandad was going off to the war soon, in the same fashion as most couples then.  They didn't have much money, and it was a very hot day.  The Landlord, who also had an ice cream parlor, took pity on the tired new couple and invited them to come down and have a cup of rhubarb ice cream to cool off.  She didn't even charge them.

  My Meme loves rhubarb, which something that not really any one from the family knew.  At the time of that story, I didn't even know what rhubarb was, short of it being some type of produce.  I don't know what it was exactly that struck me so, but I have never forgotten that story.  Maybe it was the fact that my Meme had a look of pure delight when she got to the part of the rhubarb ice cream.  I had never seen her eat anything rhubarb, in all of my years and it seemed odd to me, for her to love something so much and me having never seen her enjoy it.  Or even mention it previous to that.  I assume it was because it was something only she really cared for, so why would she make everyone else eat it?

Our afternoon drifted along, not really making any progress on a dessert decision.  A few days later, with the idea of rhubarb still very prominent in my mind, I decided to search for a rhubarb ice cream recipe.  I promptly found a recipe for 'Strawberry Rhubarb Ice Cream' on Martha Stewart's website.  It seemed simple enough.  Just cook the rhubarb in a simple syrup, and combine it with pureed strawberries and heavy cream.  After a rest in the ice box, it is ready to be churned and eaten.  It took me a few phone calls, and a couple of trips to the market but I got a hold of some rhubarb and got started. 

At the time, I was working in a restaurant and wasn't able to get home in time for the get-together my family was having.  The ice cream was a hit with my Meme and mostly everyone else and there as even some left for me to have!  I thought to take it to a boy that I fancied at the time, you know, to woo him.  About a week later, we got together and much to my dismay, it was not just us two.  He had invited his friend, Michael, over.  I remember him sitting on the couch, his left leg propped up with a wrap over his ankle (he had broken it) and a crutch leaning against the wall.  Naturally, I had to share the ice cream, and they both liked it.  Michael kept flirting with me and even, boldly, asked if he could 'see my phone'.  I told him no, and when he asked why, I said because I knew that he was going to call his phone with mine so that he could have my number, the sneaky devil.

It took about six months of persistence, on his part, but one day in late October, the 26 to be precise, we had our first date.  We have been together for over two and a half years now and I owe it all to rhubarb ice cream.


Rhubarb Ice Cream, adapted from Martha Stewart's recipe

The original recipe was misprinted and should call for 1c. + 1/4c. + 2T. of sugar.  I didn't realise this and have grown quite fond of my tart version of this ice cream.  I love tart and tangy things in general, but if you prefer a sweeter ice cream, then feel free to use the extra cup called for. I also leave out the kirsch because, at the time, I was not yet 21 and couldn't buy the stuff. 

1lb. rhubarb*
1/4c. + 2T. sugar
2T. water
12oz. strawberries
1c. heavy cream
1/2c. milk

-Begin by cleaning the rhubarb, cutting it into 1/2in. or so pieces and placing it in a pan with the sugar and water.  Cook over a medium heat, until the rhubarb it tender.
-Meanwhile, puree the strawberries and out the through a sieve to remove and bits or seeds.
-Once the rhubarb is is cooked, let it cool slightly and puree.  Put this through a sieve as well.  Combine with the strawberries, cream and milk.
-Let rest in the icebox until it is thoroughly chilled and churn in an ice cream maker**, according to it's instructions.

*Rhubarb can be found in both light pink-ish green shades and vibrant pink shades.  I recommend the pinkest that you can find, and also the smallest stalks, as they will be the youngest.  The stalks I usually by are around 1.5 inches wide and 12-16 inches in length.

**If you do not have an ice cream maker, whip the cream to soft peaks before folding in the remaining ingredients and omit the milk.  Pour into a bowl or dish, cover, and freeze until frozen.


29 May 2011

Sunday Mornings

I love Sunday mornings.  For starters, they are pretty difficult to mess up; the house is either filled with warm sunlight or cloaked with a peaceful shadow with clouds full to bursting with rain.  Everything is quiet and calm on a Sunday morning.  There is no reason to rush, all errands have already been done the day before.  The only thing that even gets me out of bed is the prospect of hot milky tea and a nice rumamge through the ice box for a hopeful breakfast.


There is absolutely no telling what will be in there.  Most certainly there will be left overs of some sort.  Bits and peices of the past week's meals scattered all throughout in varrying quantities.  There are so many options!  I always have eggs, so a fluffy omelette is always an option but sometimes I really don't want a fuss around.  Omelettes are more of a Saturday meal anyway.  There is always something that can be heaped on a pile of toast, though, or eaten straight from the container.


And, sometimes, when I am lucky, there is some left over romesco sauce.  Nevermind that I don't have any potatoes left because there is that ever present tub of cottage cheese.  I don't even know how I thought to put these two together, but I'll tell you what:  I'll never forget that I did.  Nor will I forget to repeat it everytime that I have some of this smokey, spicy, gritty-in-the-good-way paste.

28 May 2011

Saturday Mornings

Perfection.


I love Saturdays; it is when I go to my yoga class, have coffee with my Meme, dinner with my boyfriend, and maybe even catch up on some trashy television.  There is almost no way to ruin a Saturday morning.  I never plan much for Saturdays because things seem to just happen.  With out planning.  'Spontanious' seems much to exaggerated of a word, but for lack of a better word, things happen spontaneously.  There is only one constant and that is my morning tea.  I have tea every morning, a big piping mugful of very milky tea.  It is what wakes me up, but I like that it doesn't give the the shakes that coffee does (have you ever tried to hold an arm balance in yoga with caffeine pumping through your veins?).  I usually have a nice little snack with my tea on Saturdays, maybe a couple of dates, a piece of fruit or toast, but sometimes, sometimes, I have some little tea biscuits.  They are the most plain thing, or, rather, pure.  They have a subtle sweetness that is no doubt from a bit of sugar, but it isn't too much, in fact, it brings out the sweetness that comes naturally with wheat.  Dipped in hot tea, they make an ideal breakfast for my Saturday morning, neither too heavy or too light leaving room in my stomach for the possibility of a nice brunch or early lunch. 

Perfection is hard to come by.  I don't ask for much, just a mug of tea and some biscuits. 

27 May 2011

Roast Potatoes with Romesco Sauce

I would never consider myself a 'meat and potatoes' kind of a person.  Sure, I like them both well enough and I certainly do enjoy a crispy baked potato alongside a medium rare fillet mignon (even better if it has been wrapped in bacon!) or say, a pile of tender roast beef nestled next to a mound of creamy mashed potatoes rich with butter and blanketed in gravy, but those are rare treats for me.  Give me just potatoes, however, and I will be just as content.  

Most times, when I get my hands on potatoes they are roasted.  It is my preferred method because it is easy, pretty much hands off, and even better, you can eat them straight from the pan.  Not that I practice that regularly.


I would even venture to say that it is almost impossible to make more perfect a pile of salty roasted potatoes.  That is, until I made my first batch of Romesco sauce. That night, everything I knew about tomato-based foodstuff to dip, dunk, and smother potatoes in changed.  


If you have never had (or for that matter, made) romesco sauce before, it is a wonderful thing.  It is terribly easy to prepare (most of the ingredients are probably lurking in your ice box and cupboards) and it keeps in the ice box for ages. Think of it, if you will, as if an Italian was walking down the street with a bowl of pesto in hand and an American with some ketchup in tow was walking the same street.  Somehow, all of the sudden they both tripped and both the pesto and the ketchup combined and then a Spaniard came along with some roasted potatoes and......hold on- I digress....


  Let's put it this way: tomatoes are quickly pureed with some nuts, bread, vinegar, and a few other things and then bam! you have Romesco.


Now, I feel that I should be honest here.  The traditional way of making Romesco does not involve pita bread.  More like a slice of some good white or wheat bread (not the plastic super market kind, either); however, I didn't think it necessary to make an entire loaf of bread for just a meager one slice but I did have some whole wheat pita breads stashed in my freezer so that is why I called for them here.  Feel free to make the more traditional substitution of bread here, or if, like me, you keep a handy stash of pitas in the freezer, use them.  


3/4c. blanched, sliced, almonds
2 cloves garlic, thickly sliced
1/2 a large whole wheat pita, torn into pieces
....
1 can of whole peeled tomatoes, drained and liquid reserved
1/4c. jarred pimentos
2 T. red wine vinegar
4t. paprika
Cayenne pepper, to taste
3T. olive oil
(salt & pepper, to taste)


-In a medium sized pan, gently toast the nuts, garlic, and pita.  Keep moving this around as the nuts are likely to burn if you are not careful.  All you are looking for is to bring out their toasty nuttiness, so don't be bothered if the bread has only crisped up and the garlic seems unchanged.
-Puree this in a food processor until it is similar to a fine rubble.  
-Add in the remaining ingredients and puree until everything is a gorgeously thick paste.  (If it is too thick, use the reserved tomato juice to thin, adding about 1 tablespoon at a time.)
-Season to taste.


I would recommend keeping this in the ice box for a minimum of one day (two is even better) in a glass jar or other air tight container to let the flavours come together.  This will also come in handy when you get home later that week and it was a hard day and all you want is an instant dinner.  Then, all you will have to do is cut a few potatoes, toss them with oil and salt, put them in a tray, and leave them in a hot oven (around 425-450) until they are golden on the outside and creamy on the inside (45-50 minutes).

24 May 2011

Speedy Chocolate Mousse

This is not your mother's chocolate mousse.  Or maybe it is, but I can guarantee that if your mother is a sweet little french woman, then this is definitely not her mousse.  However, it is very creamy, very chocolate-y, very sweet, and very good.  


Oh, and super easy. 


Actually, this isn't even technically mousse, I dont' think.  Instead of fiddling about with separating and whipping eggs, mini marshmallows are used to both sweeten and give the spring and bounce that mousse is known for.  The unusually (and proudly lazy)substitution of mini marshmallows instead of eggs means that this particular mousse is safe for both the elderly and small children which is nifty, you know, if you are serving it to the elderly and small children.    


Adapted from Nigella Lawson's Instant Chocolate Mousse

1.5c. mini marshmallows
4T. butter
1/4c. freshly boiled water
9 oz. semisweet chocolate
1c. double cream
1.5t. vanilla

-In a sauce pan, combine the marshmallows, butter, chocolate, and water.  Let this melt and amalgamate over a low-ish flame.  When everything is melty, set it aside to let it cool.
-Meanwhile, whip the cream, by hand or machine, to firm peaks.  Stir in the vanilla. 
-Take one third of the whipped cream and mix it into the chocolate and marshmallow mixture to lighten it.  Fold this into the rest of the whipped cream.  Pour into a serving bowl or individual ramekins and let this rest in the ice box for at least an hour before serving.


Now, this is a pretty rich dessert.  If you are planning on serving it to adults, you can probably count on a minimum of six servings; however, if you are serving it to children, forget about the six and count on around feeding four children with this amount.  And be sure to save some mini marshmallows for a last minute adornment.

23 May 2011

Brown Rice and Egg Bowl

OK, let's talk about salt here for a moment:  I love the stuff.  I mean, seriously love it.  I think it borders being a problem. 

In my defense, every one on my father's side of the family is the same way.  We even have a phrase for the act of salting one's food, known as "frosting".  Take any one of us and by the time that dinner is over, and the plate has been removed from its spot on the table, there is a ring of salt.  The "Boaz Salt Ring", as I like to refer to it.  My first memory of salt came from sitting at my usual spot at my Meme's dinner table with her and my Grandad.  She had made hamburgers that night for dinner.  There were the usual suspects laid out to garnish the ever towering burgers, lettuce, onion, mustard, tomatoes, and pickles but, there was also the salt.  I can remember my Meme gently grasping the shaker of salt with the tips of her fingers and then she began to shake.  All the while while carrying on a conversation with my Grandad and I.  She just kept shaking.  Salt was going everywhere.  It honestly looked as if it were snowing at the table.  When she had finished, there was a thin layer, not quite solid but dangerously close to it turning the dark brown of the hamburger to something that more resembled gravel.  And do you know the funny thing?  At the time, I didn't even think any thing of it.  I am not sure when I picked up the salt shaker for the first time, but when I did, there was no turning back.


*A fair warning, I would file this in the eat alone with with others category as the scent of soy and boiled eggs is a little strong, but so long as your company doesn't mind, I suppose there is nothing to worry about.

1/2c. cooked brown rice, kashi pilaf, or some such
1t. soy sauce
1/2t. lemon juice
1/4t. toasted sesame oil
1/4-1/2t. red pepper flakes

2 boiled eggs, cooked to your preference

-Combine the above ingredients, and top with eggs. 

20 May 2011

White Bread


It doesn't look like much, does it? 


Indeed, it isn't much; it is nothing more than four seemingly ordinary ingredients: flour, water, yeast, and salt.

All it takes is a few ingredients, some time, and a little bit of heat to create something that has, in one way or another, been a staple in almost every diet at one point in time.  These days, 'real' bread has been renamed 'artisinal' bread, which doesn't bother me very much.  After all, it has a pleasant ring to it, don't you think?  It evokes the thought of little Italian women with hunched shoulders and aprons covered in flour.  Certainly, there is nothing wrong with those things.  It's more the fact that those perfectly white sponges in the plastic sacks at the grocery store go by the same name, bread.  

 Certainly, there is a time and a place for plastic bread, namely when there is peanut butter and perhaps jelly involved, but other than that, I don't much care for it.  The other thing is, nothing beats the glorious cackling sounds that comes only from a loaf of bread right out the oven.  The only crackling noise that the super market bread makes is when you unwrap it from the bag it comes in.

Good bread is such a simple thing.  It doesn't need to be over thought, and, indeed, over thinking a simple bread recipe is a difficult thing to do, especially when said recipe doesn't call for kneading.  What's more, there is very little hands-on time, and it also has a bit of the lovely tang normally associated with sourdough, with out the fuss of having to nurse a starter. 

A little less than 24 hours, four ingredients, and a hot oven is all that you need to make yourself a loaf of bread worthy of such a title.


This recipe was adapted from the Jim Lahey method.

400 g. bread flour
1 1/2t. salt
1/4 t. yest
1 1/3c. water

-Combine the above ingredients in a bowl using a wooden spoon.  Stir until everything is well combined.  Cover with plastic wrap and let set in a cool place for 12-18 hours*.
-Two hours before you plan to bake the bread, generously sprinkle a towel with oat bran.  Set the ball of dough in the centre of the towel and bring the sides in to form a circle.  Roll to coat entirely in the oat bran and, using the sides of the towel, lift and set this into a clean bowl.  Pull the excess towel over the top of the dough and allow to set for another 1-2 hours* in a warm spot.  (You are looking for it to double in size.)
-Being aware of your own timing, place a heavy pot, such as a dutch oven or le cruset, in the oven and begin preheating to 475f.
-When the bread and oven are ready, carefully remove the pot from the oven, place the dough inside, cover with a lid, and return to the oven to bake for 30 minutes, removing the lid after this time and cooking for a further 15-20 minutes.
-Remove from the baking vessel and allow to cool completely before slicing.

*I usually let the dough rest/proof for the maximum time, if I have the time, but it is also lovely after only 12 hours.


A couple of other notes about this bread:
-I have used up to half white flour/half wheat or rye flour with this recipe.  If you should choose to use rye flour, I would recommend adding in a generous tablespoonful of caraway seeds.
-If you won't be able to consume the entire loaf of bread within a day or two of baking, slice the remaining bread, wrap in plastic, and store in the freezer.  Use the frozen slices, as needed.


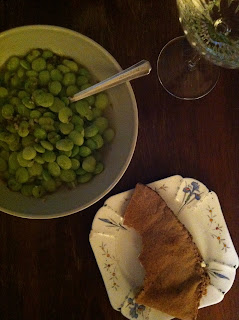
Lima beans in broth

There is something to be said about those meals that can be started the moment you walk in the door, with out even taking off your coat.  Sure you could easily just make a salad or perhaps a peanut butter sandwich, but when I am tired, I want more flavor than that.  Those things are nice, but they seem more appealing to me as lazy lunches rather than dinners.  I have mentioned before about keeping a stash of certain this and that in the freezer and nary a week goes by that frozen lima beans don't save the day in one way or another.  Their cheery bright green colour make for a nice pick-me-up at the end of a long day as well.

Straight from the freezer and into the pan with some water to cover, a bit of garlic and oregano set on a simmer, you'll have plenty of time to change out of the days work attire and maybe even have some time to spare to smoosh some feta on half a pita.


1-1.5c. frozen lima beans
1 clove garlic, minced
1/4t. dried oregano
*enough water to cover

-In a small sauce pan, combine the ingredients and bring to a simmer.  Let this cook for 20 minutes, or until soft and fragrant. 
-Serve and relax.

19 May 2011

Lima Bean and Feta Salad

Fall backs:  we all have them.  From peanut butter to soup, from tuna salad to omelettes, every one has at least one meal that they can make on a whim.  My fall back?  Frozen lima beans.

I can not tell you how many times these little green gems have saved me.  More often than not, there is at least one day a week that I have forgotten to prepare lunch the night before.  Yet, I remain unphased every time this happens because I take comfort in knowing that after a brief simmer on the stove and a toss with oil and vinegar, I have lunch for the day.


1c. frozen lima beans
~1oz. feta cheese
1/2t. olive oil
1/2-1t. red or white wine vinegar
dill, fresh or dried
oregano, dried or fresh
salt & pepper, to taste

-Fill a pot half way with water and put in the beans.  Let this come to a boil, cover, and remove from heat.  Let this sit for 4-8 minutes, until they are tender. Drain.
-Combine the remaining ingredients in a bowl, the herbs and salt to taste, and toss in the beans. 
-Pack this away or enjoy immediately.

05 May 2011

Peeps

I'll admit, it is a little late to be writing about Peeps or anything related to Easter for that matter. Let's look at it instead of it being a little early instead, shall we?  It is never too early to plan for a holiday, in my opinion, and I am here to offer a suggestion: Peeps.  Not just any regular ole peeps though, home made peeps. 

I know it may seem a little silly to make your own, but they are a lot of fun and you can control the ingredients (no corn syrup!), colour, shape, size, flavours, etc...

With three or four basic ingredients that are lurking in most kitchens, and a bit of time, you can make some pretty cute Easter or Springtime treats.


I have been making peeps for a couple of years now and have just about perfected my method, but I imagine that you could easily do the same just by making two batches in a relatively small time frame.  The thing that I seemed to get hung up on was shaping the animals to where they actually resembled an animal and not some sort of white sparkly blob thing.  The birds, as simple as they may look, are what I have the most trouble with.  The other thing to keep in mind is that this is a whipped sugar syrup, essentially, which means that as it cools, it hardens.  The gelatin helps to keep it from going completely rock hard but it gets difficult to properly squeeze out of the pastry bag after about 12 minutes, or so.  That being said, it doesn't mean that any remaining marshmallow is inedible, it just won't look very pretty.  That happens to be one of my favourite parts in making these- the cook's treat that they yield. 


My recipe was adapted from Martha Stewart's recipe for "Marshmallow for Piping"

2.5t. gelatin*
1/3c. cool water
1c. sugar
1/4c. water
1 drop of vanilla, almond, or other extract (optional)

-Combine the gelatin and 1/3c. water in a large bowl to soften. (This bowl will later be used to whip air into the simple syrup, so it will need to be something that can either be used with a stand or handheld mixer.  I would not reccommend doing this by hand.)
-In a pot, combine the sugar and 1/4c. water and bring to 238f degrees over medium-high heat, monitoring with a candy thermometer.
-When the syrup has reached the soft ball stage (238f), pour, carefully, into the bowl with the softened gelatin and, once again, carefully, begin to whip air into the mixture.  Start slowly, just to incorporate everything and then you can graduate to high speed.  This will take about ten minutes to get the desired texture.
-Meanwhile, prepare a place to pipe them.  I like to use a parchment lined cookie sheet that has then been dusted with granulated sugar.
-To the marshmallow mixture, add the vanilla and stir to combine, if using.
-Spoon the mixture into a piping bag (you'll probably have to do this in two stages, as there is quite a bit of marshmallow here) and begin to pipe.  I have taken quite a bit of help from the Martha Stewart crew on this, using this method for forming my peeps.  Keep in mind that you will have just 10-15 minutes to pipe these, but don't let that stress you out.  You will sort of get a rhythm for it.  I also like to keep a small dish of water handy for dipping my finger tip in to smooth any errors and soften any points from the piping bag.
-Dust with sugar when you are finished piping, making sure to cover the entire surface so that they won't stick to each other.
-Store in an air tight container if not consuming immediately.


*Use flavoured gelatin, if you would like, but I normally just use the unflavoured variety so that I can control what they are dyed/flavoured with.

Yields: about 16-18 2in. diameter peeps


As you can see, I left my peeps quite plain, but that is just how I like them.  I don't bother with their faces or anything like that.  Occasionally, I will dust them with coloured sugar, but once again, I usually go the simple white granulated route.