29 May 2011

Sunday Mornings

I love Sunday mornings.  For starters, they are pretty difficult to mess up; the house is either filled with warm sunlight or cloaked with a peaceful shadow with clouds full to bursting with rain.  Everything is quiet and calm on a Sunday morning.  There is no reason to rush, all errands have already been done the day before.  The only thing that even gets me out of bed is the prospect of hot milky tea and a nice rumamge through the ice box for a hopeful breakfast.


There is absolutely no telling what will be in there.  Most certainly there will be left overs of some sort.  Bits and peices of the past week's meals scattered all throughout in varrying quantities.  There are so many options!  I always have eggs, so a fluffy omelette is always an option but sometimes I really don't want a fuss around.  Omelettes are more of a Saturday meal anyway.  There is always something that can be heaped on a pile of toast, though, or eaten straight from the container.


And, sometimes, when I am lucky, there is some left over romesco sauce.  Nevermind that I don't have any potatoes left because there is that ever present tub of cottage cheese.  I don't even know how I thought to put these two together, but I'll tell you what:  I'll never forget that I did.  Nor will I forget to repeat it everytime that I have some of this smokey, spicy, gritty-in-the-good-way paste.

28 May 2011

Saturday Mornings

Perfection.


I love Saturdays; it is when I go to my yoga class, have coffee with my Meme, dinner with my boyfriend, and maybe even catch up on some trashy television.  There is almost no way to ruin a Saturday morning.  I never plan much for Saturdays because things seem to just happen.  With out planning.  'Spontanious' seems much to exaggerated of a word, but for lack of a better word, things happen spontaneously.  There is only one constant and that is my morning tea.  I have tea every morning, a big piping mugful of very milky tea.  It is what wakes me up, but I like that it doesn't give the the shakes that coffee does (have you ever tried to hold an arm balance in yoga with caffeine pumping through your veins?).  I usually have a nice little snack with my tea on Saturdays, maybe a couple of dates, a piece of fruit or toast, but sometimes, sometimes, I have some little tea biscuits.  They are the most plain thing, or, rather, pure.  They have a subtle sweetness that is no doubt from a bit of sugar, but it isn't too much, in fact, it brings out the sweetness that comes naturally with wheat.  Dipped in hot tea, they make an ideal breakfast for my Saturday morning, neither too heavy or too light leaving room in my stomach for the possibility of a nice brunch or early lunch. 

Perfection is hard to come by.  I don't ask for much, just a mug of tea and some biscuits. 

27 May 2011

Roast Potatoes with Romesco Sauce

I would never consider myself a 'meat and potatoes' kind of a person.  Sure, I like them both well enough and I certainly do enjoy a crispy baked potato alongside a medium rare fillet mignon (even better if it has been wrapped in bacon!) or say, a pile of tender roast beef nestled next to a mound of creamy mashed potatoes rich with butter and blanketed in gravy, but those are rare treats for me.  Give me just potatoes, however, and I will be just as content.  

Most times, when I get my hands on potatoes they are roasted.  It is my preferred method because it is easy, pretty much hands off, and even better, you can eat them straight from the pan.  Not that I practice that regularly.


I would even venture to say that it is almost impossible to make more perfect a pile of salty roasted potatoes.  That is, until I made my first batch of Romesco sauce. That night, everything I knew about tomato-based foodstuff to dip, dunk, and smother potatoes in changed.  


If you have never had (or for that matter, made) romesco sauce before, it is a wonderful thing.  It is terribly easy to prepare (most of the ingredients are probably lurking in your ice box and cupboards) and it keeps in the ice box for ages. Think of it, if you will, as if an Italian was walking down the street with a bowl of pesto in hand and an American with some ketchup in tow was walking the same street.  Somehow, all of the sudden they both tripped and both the pesto and the ketchup combined and then a Spaniard came along with some roasted potatoes and......hold on- I digress....


  Let's put it this way: tomatoes are quickly pureed with some nuts, bread, vinegar, and a few other things and then bam! you have Romesco.


Now, I feel that I should be honest here.  The traditional way of making Romesco does not involve pita bread.  More like a slice of some good white or wheat bread (not the plastic super market kind, either); however, I didn't think it necessary to make an entire loaf of bread for just a meager one slice but I did have some whole wheat pita breads stashed in my freezer so that is why I called for them here.  Feel free to make the more traditional substitution of bread here, or if, like me, you keep a handy stash of pitas in the freezer, use them.  


3/4c. blanched, sliced, almonds
2 cloves garlic, thickly sliced
1/2 a large whole wheat pita, torn into pieces
....
1 can of whole peeled tomatoes, drained and liquid reserved
1/4c. jarred pimentos
2 T. red wine vinegar
4t. paprika
Cayenne pepper, to taste
3T. olive oil
(salt & pepper, to taste)


-In a medium sized pan, gently toast the nuts, garlic, and pita.  Keep moving this around as the nuts are likely to burn if you are not careful.  All you are looking for is to bring out their toasty nuttiness, so don't be bothered if the bread has only crisped up and the garlic seems unchanged.
-Puree this in a food processor until it is similar to a fine rubble.  
-Add in the remaining ingredients and puree until everything is a gorgeously thick paste.  (If it is too thick, use the reserved tomato juice to thin, adding about 1 tablespoon at a time.)
-Season to taste.


I would recommend keeping this in the ice box for a minimum of one day (two is even better) in a glass jar or other air tight container to let the flavours come together.  This will also come in handy when you get home later that week and it was a hard day and all you want is an instant dinner.  Then, all you will have to do is cut a few potatoes, toss them with oil and salt, put them in a tray, and leave them in a hot oven (around 425-450) until they are golden on the outside and creamy on the inside (45-50 minutes).

24 May 2011

Speedy Chocolate Mousse

This is not your mother's chocolate mousse.  Or maybe it is, but I can guarantee that if your mother is a sweet little french woman, then this is definitely not her mousse.  However, it is very creamy, very chocolate-y, very sweet, and very good.  


Oh, and super easy. 


Actually, this isn't even technically mousse, I dont' think.  Instead of fiddling about with separating and whipping eggs, mini marshmallows are used to both sweeten and give the spring and bounce that mousse is known for.  The unusually (and proudly lazy)substitution of mini marshmallows instead of eggs means that this particular mousse is safe for both the elderly and small children which is nifty, you know, if you are serving it to the elderly and small children.    


Adapted from Nigella Lawson's Instant Chocolate Mousse

1.5c. mini marshmallows
4T. butter
1/4c. freshly boiled water
9 oz. semisweet chocolate
1c. double cream
1.5t. vanilla

-In a sauce pan, combine the marshmallows, butter, chocolate, and water.  Let this melt and amalgamate over a low-ish flame.  When everything is melty, set it aside to let it cool.
-Meanwhile, whip the cream, by hand or machine, to firm peaks.  Stir in the vanilla. 
-Take one third of the whipped cream and mix it into the chocolate and marshmallow mixture to lighten it.  Fold this into the rest of the whipped cream.  Pour into a serving bowl or individual ramekins and let this rest in the ice box for at least an hour before serving.


Now, this is a pretty rich dessert.  If you are planning on serving it to adults, you can probably count on a minimum of six servings; however, if you are serving it to children, forget about the six and count on around feeding four children with this amount.  And be sure to save some mini marshmallows for a last minute adornment.

23 May 2011

Brown Rice and Egg Bowl

OK, let's talk about salt here for a moment:  I love the stuff.  I mean, seriously love it.  I think it borders being a problem. 

In my defense, every one on my father's side of the family is the same way.  We even have a phrase for the act of salting one's food, known as "frosting".  Take any one of us and by the time that dinner is over, and the plate has been removed from its spot on the table, there is a ring of salt.  The "Boaz Salt Ring", as I like to refer to it.  My first memory of salt came from sitting at my usual spot at my Meme's dinner table with her and my Grandad.  She had made hamburgers that night for dinner.  There were the usual suspects laid out to garnish the ever towering burgers, lettuce, onion, mustard, tomatoes, and pickles but, there was also the salt.  I can remember my Meme gently grasping the shaker of salt with the tips of her fingers and then she began to shake.  All the while while carrying on a conversation with my Grandad and I.  She just kept shaking.  Salt was going everywhere.  It honestly looked as if it were snowing at the table.  When she had finished, there was a thin layer, not quite solid but dangerously close to it turning the dark brown of the hamburger to something that more resembled gravel.  And do you know the funny thing?  At the time, I didn't even think any thing of it.  I am not sure when I picked up the salt shaker for the first time, but when I did, there was no turning back.


*A fair warning, I would file this in the eat alone with with others category as the scent of soy and boiled eggs is a little strong, but so long as your company doesn't mind, I suppose there is nothing to worry about.

1/2c. cooked brown rice, kashi pilaf, or some such
1t. soy sauce
1/2t. lemon juice
1/4t. toasted sesame oil
1/4-1/2t. red pepper flakes

2 boiled eggs, cooked to your preference

-Combine the above ingredients, and top with eggs. 

20 May 2011

White Bread


It doesn't look like much, does it? 


Indeed, it isn't much; it is nothing more than four seemingly ordinary ingredients: flour, water, yeast, and salt.

All it takes is a few ingredients, some time, and a little bit of heat to create something that has, in one way or another, been a staple in almost every diet at one point in time.  These days, 'real' bread has been renamed 'artisinal' bread, which doesn't bother me very much.  After all, it has a pleasant ring to it, don't you think?  It evokes the thought of little Italian women with hunched shoulders and aprons covered in flour.  Certainly, there is nothing wrong with those things.  It's more the fact that those perfectly white sponges in the plastic sacks at the grocery store go by the same name, bread.  

 Certainly, there is a time and a place for plastic bread, namely when there is peanut butter and perhaps jelly involved, but other than that, I don't much care for it.  The other thing is, nothing beats the glorious cackling sounds that comes only from a loaf of bread right out the oven.  The only crackling noise that the super market bread makes is when you unwrap it from the bag it comes in.

Good bread is such a simple thing.  It doesn't need to be over thought, and, indeed, over thinking a simple bread recipe is a difficult thing to do, especially when said recipe doesn't call for kneading.  What's more, there is very little hands-on time, and it also has a bit of the lovely tang normally associated with sourdough, with out the fuss of having to nurse a starter. 

A little less than 24 hours, four ingredients, and a hot oven is all that you need to make yourself a loaf of bread worthy of such a title.


This recipe was adapted from the Jim Lahey method.

400 g. bread flour
1 1/2t. salt
1/4 t. yest
1 1/3c. water

-Combine the above ingredients in a bowl using a wooden spoon.  Stir until everything is well combined.  Cover with plastic wrap and let set in a cool place for 12-18 hours*.
-Two hours before you plan to bake the bread, generously sprinkle a towel with oat bran.  Set the ball of dough in the centre of the towel and bring the sides in to form a circle.  Roll to coat entirely in the oat bran and, using the sides of the towel, lift and set this into a clean bowl.  Pull the excess towel over the top of the dough and allow to set for another 1-2 hours* in a warm spot.  (You are looking for it to double in size.)
-Being aware of your own timing, place a heavy pot, such as a dutch oven or le cruset, in the oven and begin preheating to 475f.
-When the bread and oven are ready, carefully remove the pot from the oven, place the dough inside, cover with a lid, and return to the oven to bake for 30 minutes, removing the lid after this time and cooking for a further 15-20 minutes.
-Remove from the baking vessel and allow to cool completely before slicing.

*I usually let the dough rest/proof for the maximum time, if I have the time, but it is also lovely after only 12 hours.


A couple of other notes about this bread:
-I have used up to half white flour/half wheat or rye flour with this recipe.  If you should choose to use rye flour, I would recommend adding in a generous tablespoonful of caraway seeds.
-If you won't be able to consume the entire loaf of bread within a day or two of baking, slice the remaining bread, wrap in plastic, and store in the freezer.  Use the frozen slices, as needed.


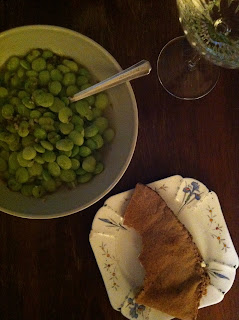
Lima beans in broth

There is something to be said about those meals that can be started the moment you walk in the door, with out even taking off your coat.  Sure you could easily just make a salad or perhaps a peanut butter sandwich, but when I am tired, I want more flavor than that.  Those things are nice, but they seem more appealing to me as lazy lunches rather than dinners.  I have mentioned before about keeping a stash of certain this and that in the freezer and nary a week goes by that frozen lima beans don't save the day in one way or another.  Their cheery bright green colour make for a nice pick-me-up at the end of a long day as well.

Straight from the freezer and into the pan with some water to cover, a bit of garlic and oregano set on a simmer, you'll have plenty of time to change out of the days work attire and maybe even have some time to spare to smoosh some feta on half a pita.


1-1.5c. frozen lima beans
1 clove garlic, minced
1/4t. dried oregano
*enough water to cover

-In a small sauce pan, combine the ingredients and bring to a simmer.  Let this cook for 20 minutes, or until soft and fragrant. 
-Serve and relax.

19 May 2011

Lima Bean and Feta Salad

Fall backs:  we all have them.  From peanut butter to soup, from tuna salad to omelettes, every one has at least one meal that they can make on a whim.  My fall back?  Frozen lima beans.

I can not tell you how many times these little green gems have saved me.  More often than not, there is at least one day a week that I have forgotten to prepare lunch the night before.  Yet, I remain unphased every time this happens because I take comfort in knowing that after a brief simmer on the stove and a toss with oil and vinegar, I have lunch for the day.


1c. frozen lima beans
~1oz. feta cheese
1/2t. olive oil
1/2-1t. red or white wine vinegar
dill, fresh or dried
oregano, dried or fresh
salt & pepper, to taste

-Fill a pot half way with water and put in the beans.  Let this come to a boil, cover, and remove from heat.  Let this sit for 4-8 minutes, until they are tender. Drain.
-Combine the remaining ingredients in a bowl, the herbs and salt to taste, and toss in the beans. 
-Pack this away or enjoy immediately.

05 May 2011

Peeps

I'll admit, it is a little late to be writing about Peeps or anything related to Easter for that matter. Let's look at it instead of it being a little early instead, shall we?  It is never too early to plan for a holiday, in my opinion, and I am here to offer a suggestion: Peeps.  Not just any regular ole peeps though, home made peeps. 

I know it may seem a little silly to make your own, but they are a lot of fun and you can control the ingredients (no corn syrup!), colour, shape, size, flavours, etc...

With three or four basic ingredients that are lurking in most kitchens, and a bit of time, you can make some pretty cute Easter or Springtime treats.


I have been making peeps for a couple of years now and have just about perfected my method, but I imagine that you could easily do the same just by making two batches in a relatively small time frame.  The thing that I seemed to get hung up on was shaping the animals to where they actually resembled an animal and not some sort of white sparkly blob thing.  The birds, as simple as they may look, are what I have the most trouble with.  The other thing to keep in mind is that this is a whipped sugar syrup, essentially, which means that as it cools, it hardens.  The gelatin helps to keep it from going completely rock hard but it gets difficult to properly squeeze out of the pastry bag after about 12 minutes, or so.  That being said, it doesn't mean that any remaining marshmallow is inedible, it just won't look very pretty.  That happens to be one of my favourite parts in making these- the cook's treat that they yield. 


My recipe was adapted from Martha Stewart's recipe for "Marshmallow for Piping"

2.5t. gelatin*
1/3c. cool water
1c. sugar
1/4c. water
1 drop of vanilla, almond, or other extract (optional)

-Combine the gelatin and 1/3c. water in a large bowl to soften. (This bowl will later be used to whip air into the simple syrup, so it will need to be something that can either be used with a stand or handheld mixer.  I would not reccommend doing this by hand.)
-In a pot, combine the sugar and 1/4c. water and bring to 238f degrees over medium-high heat, monitoring with a candy thermometer.
-When the syrup has reached the soft ball stage (238f), pour, carefully, into the bowl with the softened gelatin and, once again, carefully, begin to whip air into the mixture.  Start slowly, just to incorporate everything and then you can graduate to high speed.  This will take about ten minutes to get the desired texture.
-Meanwhile, prepare a place to pipe them.  I like to use a parchment lined cookie sheet that has then been dusted with granulated sugar.
-To the marshmallow mixture, add the vanilla and stir to combine, if using.
-Spoon the mixture into a piping bag (you'll probably have to do this in two stages, as there is quite a bit of marshmallow here) and begin to pipe.  I have taken quite a bit of help from the Martha Stewart crew on this, using this method for forming my peeps.  Keep in mind that you will have just 10-15 minutes to pipe these, but don't let that stress you out.  You will sort of get a rhythm for it.  I also like to keep a small dish of water handy for dipping my finger tip in to smooth any errors and soften any points from the piping bag.
-Dust with sugar when you are finished piping, making sure to cover the entire surface so that they won't stick to each other.
-Store in an air tight container if not consuming immediately.


*Use flavoured gelatin, if you would like, but I normally just use the unflavoured variety so that I can control what they are dyed/flavoured with.

Yields: about 16-18 2in. diameter peeps


As you can see, I left my peeps quite plain, but that is just how I like them.  I don't bother with their faces or anything like that.  Occasionally, I will dust them with coloured sugar, but once again, I usually go the simple white granulated route.